When connected to the Switch (wireless or connected to Switch), avoid touching the joystick to avoid joystick instability (drifting, random input). If you notice any joystick drift or random input issues after connecting, please try to disconnect the joystick and make a new paired connection (wireless or connected to Switch) to regain control of the joystick. View video
Wake up by any button
Except L3, R3, TURBO, Profile, FL, FR buttons, al other buttons can wakeup the joystick to enter the pairing state Note: Please do not touch the 3D joystick during the connection process.
Turbo and speed adjustment
Setting mode: TURBO +any one of the settable function buttons (can set the buttons UP DOWN, LEFT, RIGHT, A, B, X, Y, L, R, ZL, ZR Continuous mode: Turbo+ button 1-time manual continuous, 2 times automatic continuous, 3 times off continuous. Long press TURBO for three seconds to cancel the burst function of al buttons Turbo speed adjustment: left hand grip turbo+-right hand grip turbo++Adjust the burst speed:5H7 12H7 20HZ default 12HZ
Turbo setting indicator
LED lights up white when the button is not set, LED turns blue after setting. blue light flashes with the burst speed when bursting
Back-button mapping and back-button macro programming
Note: Handle must be connected state, please cancel the continuous when setting Back button mapping setting method: Left: Profile +any settable button on the left (UP, DOWN, LEFT, RIGHT, L, ZL, L3, VRL) +Profile Right: Profile + any settable button on the right (A, B, X, Y, R, ZR, R3, VRR) +Profile
Back-button macro programming
Setting method: Left: Profile +any of the left settable buttons (UP, DOWN, LEFT, RIGHT, L,ZL, L3, VRL)+ Profile Right: Profile + any of the settable buttons on the right (A, B, X, Y, R, ZR,R3, VRR)+Profile Note: FL FR can record up to 21button values, and the output will follow the time interval of the entry.
Back button setting indicator
The first time you press profile setting LED from white to blue and flashing, after the setting is complete press profile indicator blue is always on.
Back button clear
When connected to the host, hold the left and right handle Profile buttons for 3 seconds, the original functions set on the FL and FR buttons will be deared, and the LED will turn to a long white light.
Motor vibration adjustment
Adjustment method: Connected state (left or right) turbo + (corresponding) rocker up, down (up to enhance; down to weaken), adjust successfully with 2s vibration prompt. Vibration level: 100% - 70% - 30% - 0%, default 70%
ABXY light adjustment
Connected state turbo + right stick double click to turn off the light effect. TURBO+right stick long press to adjust the ABXY brightness.
Factory setting "lock mode"
Setting method: When the handle is in sleep mode, press and hold the "SL" and "SYNC" buttons for 5 seconds, the channel indicator LED1 will light up and flash slowly 3 times. Unlocked mode: charge the joystick with a USB cable mounted on the Switch console rail.
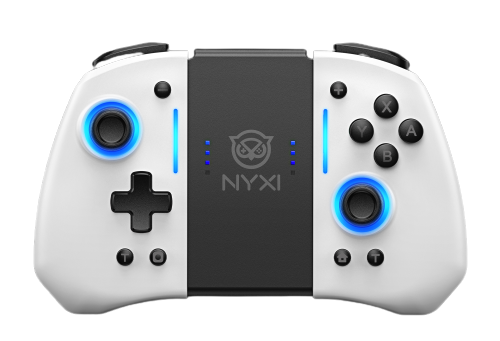
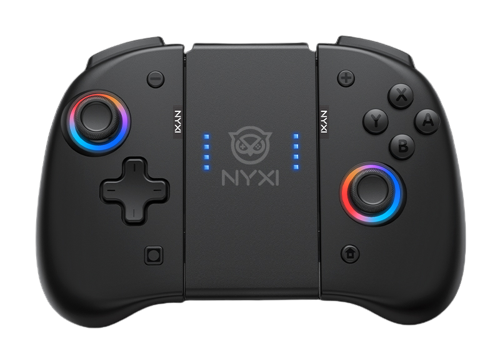
Hyperion/Athena Wireless Joy-pad
Hyperion/Athena Wireless Joy-pad
TURBO function
①Press TURBO key+A/B/X/Y/L1/L2/R1/R2/cross key to set TURBO function ②Press TURBO key+A/B/X/Y/L1/L2/R1/R2/cross key again to set Auto TURBO function. ③Press the TURBO key +A/B/X/Y/L1/L2/R1/R2/cross key for the third time to clear the TURBO function. Note: Press the button with the set TURBO function to have a vibration indication, and the corresponding TURBO button function can only be set to the corresponding handle button. Long press the single TURBO button for 5 seconds (with vibration prompt) to clear all TURBO button functions ④TURBO speed adjustment (there are three speeds that can be adjusted) Left handle adjustment method: Press the TURBO button and the "-" button, press the speed to increase by one gear, and adjust three gears, and cycle in turn.Right handle adjustment method: Press the TURBO button and the "+" button, press the speed to increase by one gear, and adjust three gears,and cycle in turn
Back key function
①Macro programming programmable keys: 2 joysticks, L3, R3, cross keys, ABXY, L, R, ZL, ZR, "+" key, "-" key. ②Press and hold the M key of the setting key to enter the macro programming (4 indicator lights are always on), then press the key you want to set (you can press one or more, you can press it at the same time or in sequence), and press the key you want to set. After pressing the button, release the setting button to indicate that the setting is complete (there will be a vibration prompt). The programming key will store the previous operation. Press the programming key next time to trigger the stored operation, which can be used to set up combos in the game. ③For example: Press and hold the M key (4 LEDs are on at the same time, do not let go of the M key that is held down)+B key, then press the A key every one second, and then press the X key every two seconds, release the M key after the setting is complete Press the key to save and exit (vibration prompt). At this time, the function of pressing the MR key is to copy the key pressed just now: B interval 1 second A interval 2 seconds X. Note: Left M key: Only set the programmable key of the left handle. Right M key: Only set the programmable keys of the right handle. The controller can be powered off and restarted to clear the set macro programming.
Motor strong and weak vibration adjustment function
Press and hold the back vibration button to adjust the vibration intensity of the motor (the left and right handles can be used as separate handles to adjust the vibration, and the vibration intensity can be cycled in turn). There are five intensities in total, 100%, 75%, 50%, 25%, 0%.
Ambient light adjustment
①T+ (click) R3/L3: Monochromatic light long-bright mode, the overall lightcolor changes to one click to change a color, the order:red/yellow/blue/green/purple/orange/white/magic color, cyclic change. ②T+ (double click) R3/L3: breathing mode; First time: RGB seven-color breath The second time: LED magic color breathing Third time: trun off the lights ③ Light brightness adjustment: T+rocker up button can increase the handle light brightness, T+ rocker down button can reduce the handle light brightness.
Handle hardware reset
Keep pressing the HOME button for more than 10 seconds to reset the controller hardware.
Handle back connection
When the handle matches the previous device, after the handle is in standby, you only need to press the HOME button/photograph button to connect back to the previous device.
Correction
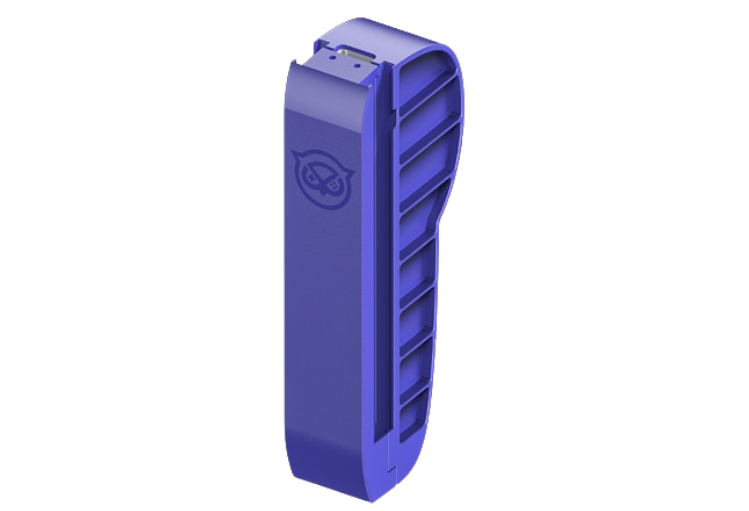
When using it for the first time, you need to calibrate the joystick and gyro sensor on the console after connecting to the console. Bridge -- Handle Connector (English: Controller Connector) After the Joy-pad (left) and Joy-pad (right) are installed on both sides of the bridge, they can be used as grip-type controllers, and you will not get tired when playing TV mode or desktop mode for a long time, and you can feel relaxed and happy.
Frequently Asked
Frequently Asked
Do these control devices need to be reconnected to the console every time?
No, it's only needed for the first pairing. All Joy-Pads &Controllers sold by NYXI have a one-key wake-up function. you can back to the game console by just pressing the Home button.
When I use it play games, can I charge the controller on the console?
Yes, this is correct, it will be charging during playing.
Do these particular JoyCons still have the drifting problem?
Any product has a service life, and each batch of products we produce will take a certain percentage of samples for one million times of stick and button testing to ensure that the quality of the products we send to customers is qualified.
And if the user experience is poor because of the quality of our products, we provide free product replacement services.
Is it compatible with my switch lite?
This is specially designed for Nintendo Switch, Switch OLED.
Can they be turned on without having to dock them?
Yes, but they need to be docked to pair the first time. Once that's done, you hold down the camera and home buttons for a couple of seconds to turn them on.
Will the consoler still fit in the dock station when the joy-con is attached?
Yes, you can still slide the switch into the dock station.
Will these work with the game Super Mario Party?
They work with all Switch games. Work better than original Joy cons.
How do I charge the joypad?
There are two ways to charge it, via the TYPE-C cable provided or charge from your switch console.
_3.png?w=500&h=341)